Tag Archives: Desserts

Recipe Review: Cinnamon Star Bread — King Arthur Flour Holiday #bakealong

Cinnamon Star Bread

Cinnamon Star Bread is the King Arthur Flour Holiday #bakealong recipe

“Anyone who gives you a cinnamon roll fresh out of the oven is a friend for life.” — Lemony Snicket, from When Did You See Her Last? (2013) (All The Wrong Questions book 2)

Cinnamon Star Bread


If you have not read Lemony Snicket’s All the Wrong Questions series, you have missed a fun experience. This is not a book to read in public unless you want to be scowled at by serious, stuffy adults who dislike bursts of laughter. If you have read the much darker toned Edward Carey’s The Iremonger Trilogy, you will enjoy the much lighter toned All the Wrong Questions books. These are “You must read this!” books. Both take a 17-degree tilt on reality, and move forward from there. Like all excellent books cataloged as junior fiction, the books entertain middle school readers as well as adults.

While the Cinnamon Star Bread is not a cinnamon roll, pulling off a piece of Cinnamon Star Bread is better than any plain cinnamon roll. Each braid is a right size special event serving. The bread presents very well. What you bake looks exactly like the picture on the King Arthur Flour website. It appears you spent hours crafting the bread when you have not. If you have at most ten people over for a holiday breakfast or brunch, there won’t be any leftovers.

I have made this bread twice. Once in mid-November 2017 before the U.S. Thanksgiving holiday as a test to see if how the bread would work as a holiday meal dessert, and, again in December for Christmas Morning’s family gathering. Both times were a success.

starbread_mixing bowl (640x480)

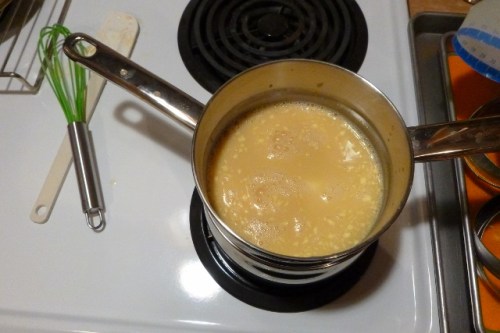
The bread ingredients added as listed on the ingredients list.

For the November baking I used the by-volume ingredient list. I combined all the ingredients into a stand mixer in the order listed. By accident I grabbed from the pantry the King Arthur bread flour. I used Bob’s Red Mill potato flour. I used Parkey® margarine instead of unsalted butter. I used vanilla extract. The water was heated to 115 F (46.1 C) as listed on the instant yeast package. The nonfat dry milk made the dough reek of rotten milk. That is part of using dry milk, I have decided. I then used the stand mixer to knead the dough for 8 minutes. After raising for an hour the dough had doubled in size. I divided the raised dough into four balls and let rest covered  in the oiled mixing bowl I used for the first raise for 15 minutes.

readyforcutting (640x480)

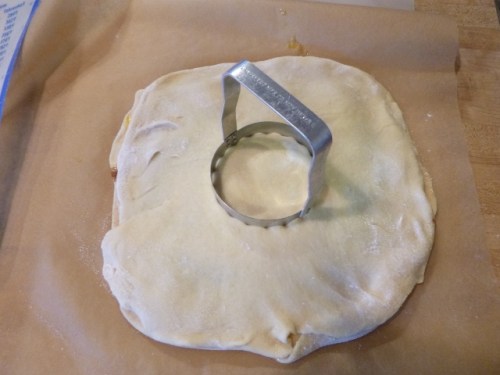
The four layers are ready to slice into sixteen strips. The biscuit cutter in the center preserves the space in the center. I cut out from the biscuit cutter to the edge.

The kneading mat has circle sizes printed on it so I was able to roll each disc out to the 10-inch (25-cm) circle. I moved the rolled disc onto a pizza tin older than I am. I brushed the egg glaze onto the disc, then sprinkled with 2 plus some tablespoons sugar-cinnamon mixture. I used Frontier ® Coop Ceylon Cinnamon and regular granulated sugar. This process was repeated with the next two discs with all remaining cinnamon sugar mixture sprinkled onto the third disc. The forth disc was placed onto the stack of discs. A 3-inch biscuit cutter was placed in the center of the stack. With a pizza cutter, I nicked the edge of the stack to eye-ball measure out 16 strips. Once I was satisfied with an even sized 16 strips, I gently cut the stack from the center out with the pizza cutter from the edge of the biscuit cutter to the edge of the stack.

cutstrips (640x480)

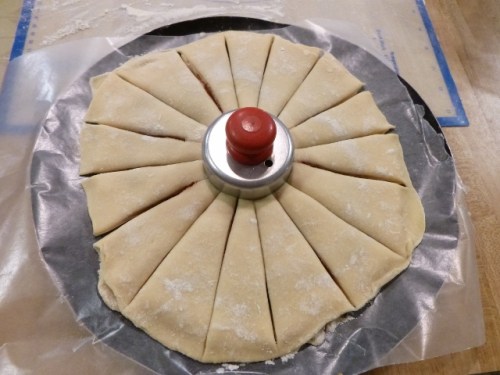
Cut strips ready for braiding.

P1040917 (640x480)

This is the December bread. The strips were braided into eight braids. To braid, take two strips and twist thumbs out – wrists up twice, and pinch the ends together. I tucked the ends under.


P1040837 (640x480)

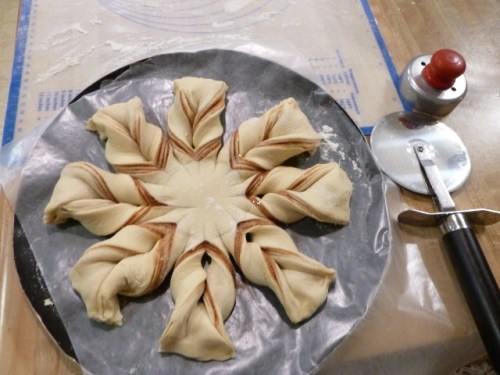
This is the November Bread ready to be placed on a baking sheet and raise.

Taking two strips I twisted the strips out (thumbs out, wrist up) twice. I pinched together and tucked under the ends of the two strips. I did this all the way around so there were eight braids. After removing the biscuit cutter, I slid the braided star from the pizza tin onto the parchment paper on a large cookie sheet. The star raised for about an hour.

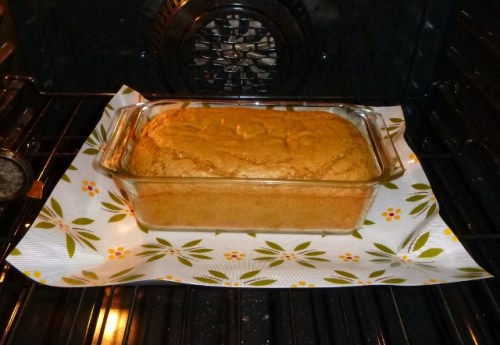
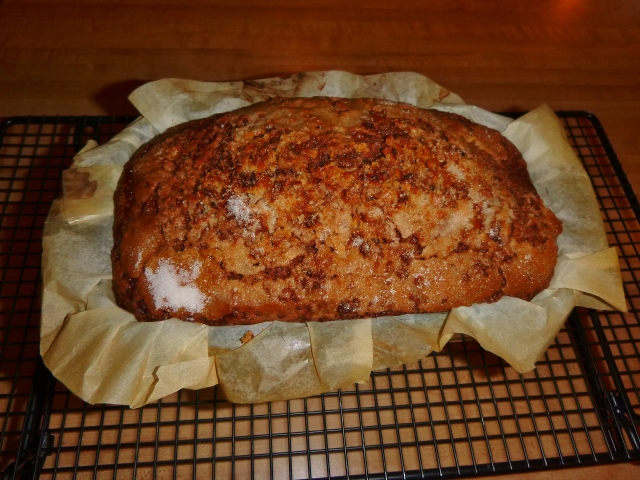
After applying an egg wash, the bread baked for 15 minutes in a 400 F (204.4 C) oven. The result was beautiful. We had the still warm bread for Sunday evening supper dessert. No knife needed. You simply pull a braid from the center and you are served.

Cinnamon Star Bread

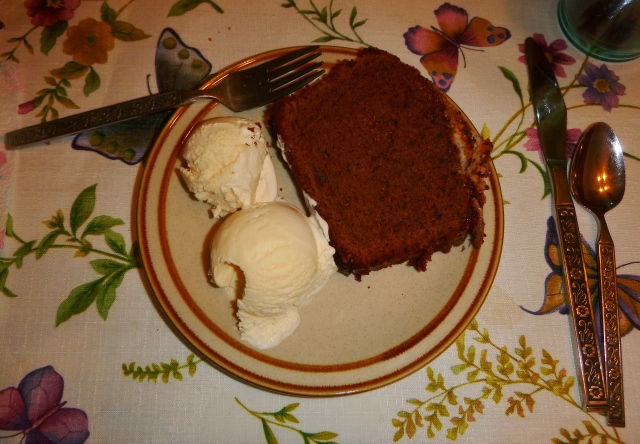
November Cinnamon Star Bread

On Christmas Eve 2017 I baked the Cinnamon Star Bread, again. After a conversation with my father, who is the baker in the family, I printed the ingredients listed by the gram from the King Arthur website. I weighed the dry ingredients and Parkey® margarine to the gram as listed on the ingredients list. This time I used the King Arthur all-purpose flour. Everything else was the same as the November baking. The lukewarm water (115 F or 46.1 C as listed on the instant yeast package) was still measured by volume. I do not know if it was because grams is more precise than measuring dry ingredients by volume, but the dough was a better quality dough after raising for 1 hour. The dough felt softer, and worked better on the kneading mat.

When it came time to layer the discs, I placed parchment paper onto the pizza tin to assist sliding the star bread onto the baking sheet . This arrangement worked wonderfully. After a one-hour raise and application of the egg wash before going into the oven, the star bread baked in 15 minutes.

DecCinnamonStarBread (640x542)

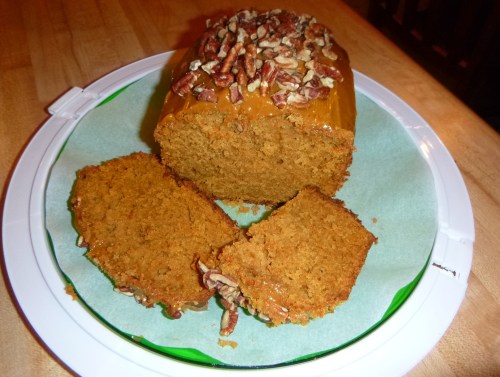
December Cinnamon Star Bread

A note of caution needs to be made when slicing the 16 strips. On one of the strips of the December star I sliced to far into the top disc and, I thought, it did not look right. I was not pleased with the look of the finished product. It was not as pretty as the November star bread. If you want a uniform center, be careful how you slice into the center for the braid strips.

Cinnamon Star Bread will be wonderful for potluck dinners. This bread should also do well at bake sales and silent auctions. If you want to impress the in-laws, this braided bread to do that. If you follow the instructions exactly, and apply the egg wash, the braided bread will look like the King Arthur Flour picture. The bread is best served with good quality coffee. A dark breakfast tea would also go well with this.

The #bakealong recipe can be located at https://blog.kingarthurflour.com/2017/11/01/cinnamon-star-bread-bakealong/

Lemony Snicket’s All the Wrong Questions series website is here: http://www.lemonysnicketlibrary.com/

Here is National Public Radio’s review of Heap House. You must read this book! As the reviewer Amal El-Mohtar points out, you do not want to read this book in a place where you are expected to be quiet.  https://www.npr.org/2014/10/17/356989525/heap-house-is-a-treasure-of-a-trash-tale

Recipe Review: Rugelach — King Arthur Flour October #bakealong

“I use some of their recipes in supporting roles—apricot jelly roll, mandelbrot, and honey cake. My mother Madeleine’s rugelach were unbelievable. I could not use them here because they would have upstaged everything and everyone else. Apple cake is food for a short story. Rugelach require a novel.” — Allegra Goodman discussing the short story “Apple Cake” in an interview with Cressida Leyson in the June 27, 2014 The New Yorker

 Rugelach

I have for several months wanted to participate in King Arthur Flour’s bakealongs but did not make the time. These are interesting baked goods I would not have otherwise made. Several recipes looked intriguing, and I do like to be intrigued. When the email came across my dashboard, I thought the Rugelach recipe looked good. I made up my mind to do make the pastry.

Rugelach is a traditional Northern and Eastern European Jewish holiday pastry with Middle Eastern roots.  The Jewish-American cream cheese rugelach originates from this Ashkenazic food tradition. Some scholars think the pastry was brought to the United States by Jewish immigrants from Hungary or Yugoslavia. Historically the rugelach dough was made with yeast and butter or sour cream. This would have made for a delicate pastry that would have been easily overworked. Linguistically, rugelach has several spellings depending on which Northern and Eastern European country you are located. Yiddish scholars trace rugelach to a Polish origin, but it depends upon the source you are reading. In the Polish tradition, rugelach is traces back to “rogal” which means “horn” as in an animal horn or a musical instrument. When shaped into a crescent, the pastry looks like a horn. In the modern, postbiblical Hebrew rugelach is similar to “roglit” meaning “trailing vines” which could also describe the shape of the rolled, crescent pastry.

First, a note on ingredients. I used Parkay® margarine instead of butter. Here in Northeast Kansas it is possible to get good European butter, but you drive several hours to the European-specialty Shoppe. Parkay® produces a nice taste whereas the pale butter you buy in the grocery store, even the better stores, tastes flat and blah.

The recipe provides two suggestions on how to make the dough. I did not use the two suggestions. I sifted the flour and salt together, then with a pastry cutter cut the butter and cream cheese until they were the size of the end of my thumb. I then cut into the flour-fat mixture the 1/3 cup sour cream. I understand the sour cream was to add moisture so the dough could be formed, but the sour cream I used was not wet enough. The flour and fats would not stick together. I added at one time 1 tablespoon of cold water. Now, I could have added the water 1 teaspoon at a time, but I did not want to overwork the dough. I simply looked at the dough and asked myself if 1 or 2 teaspoons of water would do, and I knew 4 would be too much. That is where I came up with a tablespoon.

flour cut with margarine and sour cream

flour cut with margarine and sour cream

Following along with Step 3, I wrapped each disk of dough in plastic wrap and placed the disks in the refrigerator. I waited an hour. The dough was no way firm enough to be handled. The three disks chilled in the refrigerator for 3 hours.

While the dough was in the refrigerator, I made the filling. I used ½ cup of dried cranberries and ½ cup dark brown sugar. The mixed varieties of walnut meats were collected by a friend who was kind enough to share. The walnut meats are sweet and snack worthy. I used a blender which worked fine.

blender with rugelach filling

blender with rugelach filling

I did not add the cinnamon to the brown sugar-walnut-cranberry mixture. My chemistry background shouted to let sleeping alkaloids and essential oils that make cinnamon so wonderful lie for as long as possible. I placed the brown sugar-walnut-cranberry mixture in the refrigerator until I was ready to use it.

walnut-brown sugar-cranberry filling in blender

walnut-brown sugar-cranberry filling in blender

After 3 hours when I decided the dough was firm enough, I removed one disk at a time from the refrigerator. Using a silicon dough mat with a 10-inch circle imprinted on it, I rolled the dough as directed. I carefully moved the 10-in diameter circle onto a dented metal pizza tin that is as older than me. I brushed water onto the dough. I then placed 1/3 cup filling plus a ½ of a 1/3 cup filling onto the circle and pressed the filling into the dough. Then I evenly dusted the filling covered dough with 1 t. cinnamon.

rugelach dough with filling ready to cut

rugelach dough with filling ready to cut

It took me all three disks before I was able to cut the dough evenly into nice shaped wedges. I used a pizza cutter. The first disk I made eight wedges instead of twelve. The second disk had very uneven sized wedges. I finally got it right on the third try. The first two disks I just cut away attempting to measure the correct divisions by eye. That did not work. The third disk I thought it out and pre-cut the edges to measure out twelve even triangles.

rugelach ready to go in the preheated oven

rugelach ready to go in the preheated oven

Each triangle was rolled wide side to narrow side. I used a silica pan liner for the first pan, then decided to cover the pan liner with parchment baking paper for the other two pans incase the brown sugar melted and pooled. Each pastry was brushed with milk before being placed on the cookie pan. I refrigerated the cookie pans for upwards of 10 minutes before placing in the preheated oven. The rugelach baked for 30 minutes before the bottoms of the pastries were browned to my liking.

baked rugelach

baked rugelach

This is a fun pastry I will be making again. The cranberries provided a hint of bright fruit. The crust was buttery. Next time I will experiment with orange marmalade as the glaze under the brown sugar-walnut-cranberry mixture, and I will add dark chocolate chips. I also want to substitute dried apple pieces marinated in brandy for the cranberries. There is plenty of room to play with creating my own filling for rugelach. Only lack of imagination will limit what one can do with this pastry.


Websites for more information on King Arthur’s #bakealong and Rugelach

https://www.kingarthurflour.com/bakealong/

https://en.wikipedia.org/wiki/Rugelach

http://www.foodtimeline.org/foodcookies.html#rugelach

http://www.theluxuryspot.com/the-complete-rolled-history-of-rugelach/


Book Review of Pushing the Line by Kimberly Kincaid and a Recipe Review of the recipe it contained Grandma Izzy’s Pecan Clusters

PushingTheLinebyKimberlyKincaid

There is an entire sub-genre within the romance and mystery genres that involves cooking and baking where a particular recipe plays an important role in character development or the plot’s unfolding. The heroes of these culinary romances are generally no-nonsense women who have a business to run, or life to live, and children and grandchildren to raise. Through cooking for and feeding others these heroes express and often identify their femininity and inner goddess. I am oversimplifying the idea but these female heroes don’t need the hero in their lives, but through cooking for him they reveal to themselves they are a woman, have womanly thoughts, and the hero might be good to have around.

I do not read contemporary romances and hardly any mystery novels so I have missed out on this sub-genre. Most I have seen on the self, at least mystery-wise, look like I would get cavities by reading the book, if it were possible. Pushing the Line was a self-published book on the 2015 RWA RITA Award finalists’ listings so I thought I would give it a try.

Book Review: Pushing the Line by Kimberly Kincaid

Pushing the Line (No. 4 of The Line Series) by Kimberly Kincaid is a 2015 RWA RITA Award finalist in the novella category. Pushing the Line is a self-published novella. The RWA Rita Awards define a novella as a story between 20,000 and 40,000 words long. Other literary and genre awards recognize different word count maximums as their definition of a novella (https://en.wikipedia.org/wiki/Novella). Novellas generally contain chapters, think Hemingway’s The Old Man and the Sea, whereas short stories have a blank line between sections.

Novellas, because of their nature are often quick reads and contemporary romance Pushing the Line is no different. One can read Pushing the Line in under 3 hours. I purchased it as an e-book and its formatting within my Kindle was not a problem to the reading experience. In summary, Harper McGee a free spirited artist crashes, emotionally and physically, back to her hometown after the death of her beloved grandmother who raised her. She discovers her grandmother left her the local landmark candy shop, and what does someone who has not spent more than seven days in one place since college do with a such business. The candy shop coincidentally and mysteriously catches fire after the reading of the will. McGee rushes into the burning building (????) and our hero Aaron Fisher the fireman leads (drags?) her out of the dangerous situation. McGee cannot sell the business after the fire until the building is brought up to city building codes, so she contracts to have the renovation done and guess who is the sub-contractor (this is quite believable, actually): our hero Fisher the fireman. Sparks fly and embers burn as McGee and Fisher, both rootless, figure out what to do with the attraction between them. Here enters the mystical, magical pecan cluster chocolate candy. This recipe is a plot device that proves to all who eat the candy, and to McGee, she is the mythical feminine figure who possesses the magic to cook this recipe like no one else. It is a romance novella and ends as a romance should.

Pushing the Line is very well done. It deserved its RWA RITA nomination. I kept expecting the disagreeable cousin to demand McGee sell the candy shop so he could receive a full portion of the inheritance. I fully expected him to be behind the candy shop fire. I still feel the old wiring explanation is not right, and the disagreeable cousin faded from the story much to easily. Perhaps in an effort to keep the story under 40,000 words that complication had to be edited out. I did not know how Kincaid was going to wrap up the story for her happily ever after ending, and she provided a good ending. Pushing the Line was well written, well formatted, and an enjoyable read.

Recipe Review: Grandma Izzy’s Pecan Clusters

I made Grandma Izzy’s Pecan Clusters as Kincaid presented the recipe at the end of Pushing the Line. I knew that as I read through the recipe the first time there were going to be problems. The end of the recipe she says to drop the chocolate and pecan mixture by a tablespoon onto waxed-paper sheets. I did not see how the evaporated milk-sugar mixture could hold any shape when hot, so I used little shaped squares and any excess would be treated as goo and shaped later with a spoon. Where the recipe goes wrong is it does not tell the reader/candy maker how hot to heat the evaporated milk-sugar mixture. I followed the recipe as written and did not use a candy thermometer.

There is nothing magical about basic cooking and this is a basic recipe. Cooking and baking is plain, old fashion chemistry. Cook the candy until it reaches the temperature point of “soft ball”, and you can get all fancy after that. Once you master, for example, cooking a hard-boiled egg you can then get fancy and magical with the deviled egg recipes, but you have to learn how to boil the egg first.

sugar and condensed milk (640x427)

Evaporated milk, sugar, and clear corn syrup mixture heating in a double boiler.

So, you have the sugar and corn syrup and evaporated milk heating in the double boiler (a very important thing that double boiler) and you now need to take your candy thermometer and heat the mixture until the thermometer reads 230 °F (110 °C). Stir constantly for two minutes, and do not let the heat rise above 240 °F (115.5 °C), otherwise the sugar will do things you don’t want it to do. Remove from heat and carefully add in small amounts the milk chocolate chips or pieces, stirring between additions until what you added melted. Then, add the pecans and stir until coated. I chopped the pecans into small pieces. Spoon into your candy forms or chance the waxed paper. Refrigerate immediately.

cluster in form (640x427)

Spooning the chocolate pecan mixture into the candy forms.

I did not allow the evaporated milk-sugar mixture to get hot enough and it was a soft goo that did not take any shape even after refrigerated overnight. It has to be eaten with a spoon. It tastes very good spread on toast.

did not solidify (640x392)

The soft chocolate pecan mixture after being refrigerated overnight was not solid enough to hold a form. It tastes good when spread on toast.

Grandma Izzy’s Pecan Clusters taste good, but you need to use a candy thermometer to get the evaporated milk-sugar mixture hot enough the sugar dissolves properly so that you get to the “soft ball” phase. Enjoy this good recipe and its good story.

Pushing the Line (No. 4 of The Line Series) is available as an e-book and as a printed book through your favorite online retailer or by ordering through your local book store. You can check with your local library or state library to see if it is available. If not, request it.


Here is a link to Kimberly Kincaid’s website. You can order it through her links. That helps her out, too.

http://www.kimberlykincaid.com/index.html

For a quick summary of candy making, I would encourage you to look at Wikipedia’s entry. The entry reports “soft ball” starts at 234 °F (112 °C), but I think there is enough wiggle room when it comes to thermometer accuracy to think 230 °F (110 °C) is a good starting point, too.

https://en.wikipedia.org/wiki/Candy_making


Recipe Review: Sweet Potato Bread with Caramel and Aleppo-Spiced Pecans by Gerardo Gonzalez (Epicurious, September 2014)

SweetPotatoblogNoahVerrier

“Sweet Potato” oil on canvas panel, 10X8, by Noah Verrier featured on Verrier’s Daily Paintings blog on 17 June 2009

The sweet potato [Ipomoea batas (L.) Lam.] is a tuber vegetable plant that originated and was domesticated millennia ago somewhere between the Yucatan Peninsula of modern Mexico and Orinoco River in modern Venezuela. Our modern sweet potato is a member of the morning glory family Convolvulaceae family and possibly only distantly related to the potato (Solanum tuberosum L.) of the nightshade Solanaceae family. Sweet potato is purported to be the only globally important food crop among the Convolvulaceae. A raw, unpeeled sweet potato is rich in antioxidants and fiber. The sweet potato is not grown from seed, and does not tolerate frost. The sweet potato plant does not tolerate water-logged soils, and does best in sandy soil. University of Missouri Extension suggests home gardeners plant the tuber slips in raised beds or a black plastic mulch pieces and then cover with an organic mulch such as straw or hay.

Sweet potatoes have become a prominent component of the US “Southern” identity in the past couple of decades. The tuber was documented as being grown in Virginia in 1648. Sweet potato was documented as being grown by the local Native American residents when the first Acadian Canadians, now known as Cajuns, arrived in Louisiana in the mid-1700s. The sweet potato probably was not present at the Massachusetts Pilgrim’s Thanksgiving celebrations unless the Native American neighbors brought them. Yams (Dioscorea species) originated in Africa, and probably were also unknown to the Pilgrims and their rocky New England soils.

Recently Southern US themed women magazines have celebrated preparing sweet potatoes for Thanksgiving, Christmas, and everyday meals. Fried sweet potato fries and baked chips are popular sandwich side dishes. Mashed and baked sweet potatoes are more common at restaurants. What modern sweet potato enthusiasts conveniently forget is that sweet potatoes were the food of poor people, both black and white and all those colored folks in between. If one had any money one did not eat sweet potatoes. Once people left poverty and the South behind it is my understanding no one wanted to even smell sweet potatoes except when the “traditional” American holiday dinner required it.

We found ourselves with an abundance of purchased sweet potatoes several months ago. When cured correctly, sweet potatoes last up to 10 months if dry and stored at 55 to 60°F (12.7 to 15.5 °C) at high humidity. These potatoes that we acquired were not cured well and needed used as soon as possible. One can only eat so many of variations of mashed sweet potatoes.

The sweet potato bread recipe called for a pound of sweet potatoes. I weighed out 16 ¾ oz raw sweet potatoes. The recipe called for piercing the sweet potatoes several times then baking on a baking sheet, but I did not do that. I peeled and then wrapped the potatoes in aluminum foil and baked at 400 °F (204.4 °C) for an hour. I pureed the baked sweet potatoes and scooped out 1 ⅓ cup of sweet potatoes into a mixing bowl and allowed the purée to cool so not to cook the eggs. I used half-and-half and not whole milk. A quarter cup (2 oz) half-and-half is easier to obtain than 2 oz whole milk. Use a tasteless oil such as canola so that the sweetness of the potatoes comes through. The dry ingredients were added as instructed in batches to the wet ingredients. It is very important to use cake flour. Cake flour is milled finer than all-purpose flour. Cake flour produces a more delicate crumb and texture than all-purpose flour which is more desirable in a heavier batter quick bread. It is important to gently stir until all the dry ingredients are just moist. The batter does not photograph well.

halfway through baking (640x442)

the sweet potato bread after 30 minutes of baking

I poured the batter into a greased loaf pan. The oven was set to 325 °F (162.7 °C). As directed I turned the loaf 180° around 30 minutes into the baking time. The recipe says allow 60 to 75 minutes to bake. It took 70 minutes baking for the toothpick to come out clean.

after 65 minutes

toothpick after 65 minutes of baking

clean toothpick 70 minutes

a clean toothpick after 70 minutes of baking

After the bread (cake) had cooled it slipped out of the loaf pan easily. I topped the loaf with 3 tablespoons dulce de leche. Amazing stuff that dulce de leche. I sprinkled about ⅛ teaspoon salt over the caramel topping. I could not find any Maldon type salt except in a King Arthur Flour catalog, so I used a medium ground sea salt. I toasted ⅓ cup chopped pecans, the recipe called for ¼ cup, in a 325 °F (162.7 °C) oven for about eight minutes stirring frequently for even toasting, and pressed the pecan pieces into the caramel. I could not find Aleppo pepper flakes outside of a catalog or the internet. I am not sure what 1 ½ teaspoon pepper flakes would add.

sliced sweet potato bread

sliced sweet potato bread with dulce de leche and toasted pecans

The sweet potato bread was cake-like and we ate it as a dessert. It was amazing. This bread/cake was very moist and maintained its moistness over a couple of days. I have made this recipe several times over the past couple months. This is a type of bread/cake that you would spend $4.5 for a slice in a nice coffee shop. Did I mention the break/cake is amazing?

The recipe can be found at: http://www.epicurious.com/recipes/food/views/sweet-potato-bread-with-caramel-and-aleppo-spiced-pecans-51249830

“Sweet Potato” oil on canvas panel, 10X8, by Noah Verrier featured on Verrier’s Daily Paintings blog on 17 June 2009 http://noahverrier.blogspot.com/2009/06/sweet-potato-oil-on-canvas-panel-10×8.html

If you want to know more about the harvest of US sweet potatoes, here is a report from NPR.  “Behind Your Holiday Sweet Potato Dish, Hard Work In The Fields” by Dan Charles. Updated January 11, 201612:12 PM ET, Published November 24, 20155:32 AM ET http://www.npr.org/sections/thesalt/2015/11/24/457203127/behind-your-holiday-sweet-potato-dish-hard-work-in-the-fields

If you want to grow your own sweet potatoes, the University of Missouri Extension has a nice write-up. http://extension.missouri.edu/publications/DisplayPub.aspx?P=G6368

Recipe Review: Chocolate-Coconut Pound Cake by Alison Roman (Bon Appétit, March 2014)

Chocolate-Coconut Pound Cake with vanilla ice cream.

Chocolate-Coconut Pound Cake with vanilla ice cream.

“I could be hit by a Sara Lee truck tomorrow. Which is not a bad way of going: ‘Richard Simmons Found in a Freeway in a Pound Cake and Fudge, With a Smile on His Face.’ Let’s face it. We don’t know anything” Richard Simmons (b. 1948), enthusiastic exercise leader

My father purchased a coconut at the grocery store. When my father was a child in the 1950s as a treat my grandmother would buy a coconut, drain the coconut liquid out for the family to drink, and make things from the raw, unsweetened coconut. I have in my memory the story she would take the coconut out to my grandfather’s wood shop, put the coconut in a vice, and use a hand drill to make a hole. Dad used a screwdriver and clawed hammer to pound an opening. He poured off the coconut liquid which mom used in her smoothies, and pried the rich, white meat from the shell.

What was he to do with all that coconut meat? He has images of heavenly coconut cream pies with fluffy, sky-high meringue like his mother used to make. I will get the pies made, eventually, but I wanted to try a cake first. This is a cake recipe I had put back and waited to make.

I had no idea how much of the raw coconut would be required for the 1/4th cup (by volume) as called for in the recipe. This is partially why I did not tackle the coconut cream pie because I had no idea how much coconut would be required. I hand-grated frozen coconut pieces. I did not make a dent in the sum total of all the coconut by removing a grated 1/4th cup. We have enough coconut for several pies. I need to find a better way to grate the coconut meat.

Following the directions, I buttered the loaf pan and lined it with parchment paper. You need to leave the “generous overhang”. The browned paper edging looks classy, I think, and that overhang keeps the batter when poured into the loaf pan inside the parchment paper and away from the pan walls. I would recommend cutting the parchment paper into a circle before placing it into the loaf pan. The square ends of the parchment paper burn and smolder, while a circle shape browns without catching fire. I did not think of this until the paper had been placed inside the loaf pan and cut the edges of the overhand into an overall circle shape.

The cake batter went together well. Make sure to use a stand mixer with an very open bowl because you need to aerate (add air) to the batter. Beat at medium-high speed for the entire time period, 5 to 7 minutes before eggs, and 5 to 8 minutes after eggs until the batter volume has doubled. You want a light batter. With a slow speed, add the dry ingredients and the buttermilk as directed. As soon as the dry ingredients are moistened and just incorporated, stop the mixer. Cease, halt, and discontinue the electric mixer. You may want to take a couple of turns with a spatula to clean off the sides of the mixing bowl, but that is it. Gently pour the batter into the cake pan, and run spatula down the center of the full loaf pan. Sprinkle with the tablespoon sugar and all the coconut.

Pound cake batter topped with white sugar and grated coconut before it has been placed in the oven.

Pound cake batter topped with white sugar and grated coconut before it has been placed in the oven.

When I sat down to read the recipe before preparing the batter, my first thought was there was no way this cake would be done in a 325 °F (163 °C) oven in 70 minutes. Experience told me this cake, with or without foil to protect the coconut from scorching, would take 90 minutes to bake. I was correct. I gently placed the cake in the oven and set the timer for 60 minutes. I did not open the oven once in those 60 minutes. When the timer beeped, I opened the oven and surmised the cake had a long ways to go to be done. There was still liquid on top of the cake. I set the timer for another fifteen minutes (75 minutes total baking time) and waited. When the timer beeped, I tried, again, and the toothpick tester was wet with cake batter. I set the timer for another fifteen minutes (90 minutes total baking time). After 90 minutes, the cake was done, but could have been removed five minutes sooner. The bottom corners of the cake were slightly overdone, but the cake was cooked through. Next time I will allow 85 minutes total baking time.

Chocolate-Coconut Pound Cake fresh from the oven.

Chocolate-Coconut Pound Cake fresh from the oven.

I planned to serve the cake for dessert for our family Sunday afternoon dinner. The additional baking time pushed allowing the cake to cool in pan to fifteen minutes before I sliced it. This did not hurt the cake.

Chocolate-Coconut Pound Cake after it has been sliced.

Chocolate-Coconut Pound Cake after it has been sliced.

Next time I go to a community meal or supper get-together, I will seriously consider preparing this cake. It looks so charming presented in the parchment-lined loaf pan. It is an easy recipe to make, it just takes time to mix in the electric mixer and bakes for an hour and a half.

Richard Simmons is correct. You do not know what is going to happen next. Make your cake and eat it, with ice cream, and chocolate syrup, and excellent coffee. Savor what you have when it is in front of you. Enjoy.

Here is a link to the recipe:

http://www.epicurious.com/recipes/food/views/chocolate-coconut-pound-cake-51223990

Here, too, is Epicurious’ instructions on how to open a coconut.

http://www.epicurious.com/recipes/food/views/opening-a-fresh-coconut-104353

Recipe Review: Peaches ‘N’ Cream Éclairs with Bourbon Caramel Sauce by Lawrence Karol in Gourmet, July 2007

Several years ago, for the family 4th of July picnic, I made several desserts. The cousins are still talking about the Pavlova. During the U.S. Memorial Day holiday at the end of May, the cousins start asking what dessert am I going to make for the 4th of July this year. Since the Pavlova, my dessert contribution is now expected to be dramatic and tasty.

For 4th of July, 2011, I prepared Lawrence Karol’s Peaches ‘N’ Cream Éclairs with Bourbon Caramel Sauce from Gourmet, July 2007. Because this is my mother’s party, she has always volunteered to buy ingredients. The nice thing about this recipe, and the author states this in his brief write-up, is that most ingredients can be found in a well-stocked pantry and refrigerator. The only ingredients my parents purchased for this recipe were the white peaches ($3.80) and heavy cream ($3.59). One nice thing about cooking at my parents’ house is they have every kitchen gadget you could want to play with.

Following the directions of the recipe, the choux pastry quickly came together with no fuss. After mixing the flour mixture of margarine, water, salt and flour in the sauce pan, I transferred the dough to a metal mixing bowl. It took longer than the recommended five minutes to cool the dough to the point I felt comfortable adding the eggs. I wonder if this isn’t because I was using a metal bowl and not a glass bowl. When I make éclairs at my house, I use glass mixing bowls. Perhaps the metal holds the heat longer than glass.

The recipe only made seven pastries instead of the recipe-listed eight. Before this recipe, I have not used a pastry bag to make éclairs. Usually, I evenly divide the dough into desired number of pieces, use a large spoon to place on the baking sheet and shape (Unorthodox?). The pastry bag was a two person operation: I held the pastry bag and my mother spooned the dough out of the mixing bowl.

Figure 1. Pastries were sliced after cooling.

Baking was easy. Placing the pastries in a preheated oven at 425° F for 15 minutes and then lowering the temperature to 400° F for 15 minutes (30 minutes total baking) produced lightly golden pastries (Fig. 1). Using my father’s silicon-lined baking sheet produced pastries that were the same color on the bottom as well as the top. When using a buttered baking sheet or a sheet lined with parchment paper, I often have trouble obtaining a uniform color on the top and bottom of the pastry.

Figure 2. Eclairs with peaches, whipped cream and caramel.

One disappointment is the pastries were not as puffy as other éclair recipes I like to make (Fig. 1). The pastry tasted rich, but crumbled when sliced. That said, the photograph of the finished dessert on page 20 of Gourmet, July 2007 looks rather not puffy. So, maybe the pastries were like they were supposed to be. The whipped cream seemed to glue the pastries together (Fig. 2).

Figure 3. Bourbon caramel sauce.

I found it difficult to keep the sauce at a constant temperature; the sauce was either to hot or to cool (Fig. 3). However, making the sauce was easy. I would suggest constant stirring. Once the sugar has melted, you need to take care when adding the water and other ingredients. The steam coming off the skillet could be dangerous. I lightly scalded the tip of my right index finger. The hot material splattered until the sauce calmed down.

Figure 4. My cousin holding the served eclair topped with the bourbon caramel sauce.

The finished éclair with the bourbon caramel sauce was amazing (Fig. 4). I was not prepared for the “Oh my God! This is good.” experience. The cousins, aunts and uncles loved it. My mother declared the recipe “a keeper”. Because this was a family pot-luck there was lots of food so only making seven pastries was not a problem like I feared. There were no left overs, yet everyone who wanted was able to have half an éclair.

I felt like I spent more time fretting over the bourbon caramel sauce than any other task involved with this recipe. There was much more sauce than pastries. The bourbon caramel sauce went wonderfully over my brother’s home-made vanilla ice cream.

If you have not made éclairs before, this would be a good introduction. Éclairs are extremely simple and quick to make. For such little effort, you can look good.

Now, the question is what am I going to do 4th of July, 2012?